Note: I may do a video to accompany this later. Let me know if that would be of interest…
A Short Introduction
Micro-controllers have been around a long time. Just recently though they have attracted a lot more interest, thanks mainly to the Arduino boards. People all over the world are now building all sorts of exotic and innovative creations. If you are new to micro-controllers you would be well advised to start with an Arduino board (Arduino website).
Once you have played with this for a while you will probably be interested in getting some of the shields (plug in boards) that help out with tasks like driving motors (e.g. for robots) or LCD displays or connecting via wireless. USB or ethernet etc.
You will also discover that there are other boards available – using different processors. The ones that I’m going to mention here are the PIC based ones made by Digilent (chipKIT). These are the Uno32, uC32, DP32 and Max32. They are all based on the PIC32 chips. They run a lot faster than the Arduino boards (which are based on Atmel processors). Be warned though that you won’t be able to use the Arduino IDE – you have to use a specially adapted version called MPIDE. The idea is that you should be able to use sketches built for Arduino boards and recompile them without modification using MPIDE for the chipKIT boards. In practice, it’s not always as easy as that, so if you decide you want the faster speed and extra features, you may have to put up with having less support than you get with the Arduino boards.
There is another approach, which I am going to use – which is to use the PIC devices directly. Also, instead of using the MPIDE, I will be using Microchip’s IDE – MPLABX. Microchip provide three free compilers – XC8, XC16 and XC32 depending on whether you are programming an 8bit, 16bit or 32bit chip. They also provide an assember – MPASM if you need really feel the need to write the code directly in assembler!
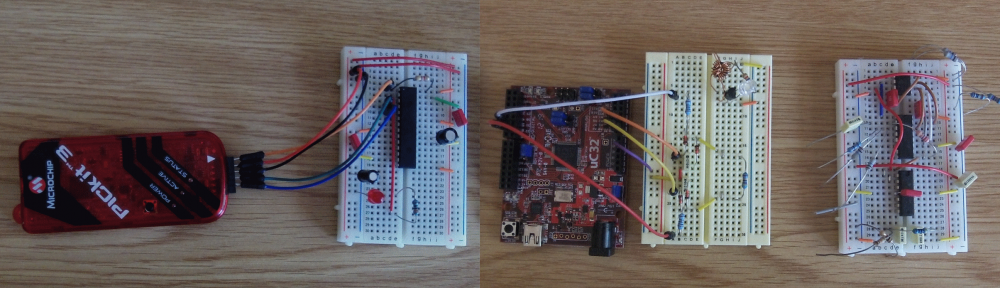
You can use the chipKIT boards with MPLABX, but to be honest, if you are going down this route you might as well just program straight to the device itself. You’ll need a few external components, but you can build this all on a small breadboard, like this one:
You will need to get a programmer / debugger, and the one that I would recommend is the PICkit 3. This connects your PC (Windows, MAC or linux) via USB, and to the board via a 6 pin header. This is obviously more effort that using the Arduino IDE or MPIDE, but there are several benefits to this extra effort:
- Debugging (including breakpoints and register / variable inspection).
- Ability to use a much wider range of devices.
- Easier to understand hardware (most projects can be done with very few external components).
There are many other benefits – this is just some of them.
So if you’ve got here, you’re either an advanced user, or you’re felling brave and want to do some real hacking with real devices. If it’s the latter I applaud your ambition!
I will try to make this as painless as possible with the upcoming tutorials. I am sure that you will find it much more satisfying than using a pre-built board.